Saturday, June 8, 2013

Blanks to Beauties

Not many people outside of the sign painting profession know and understand the work that is involved in making signs the old fashioned way. When someone asks the cost for a set of hand painted signs for their shop and following your estimate they proceed to raise any eyebrow is why I'm writing this. Not just to educate the general public that don't know or understand the reasoning behind the price but for beginners to learn from as well. I'm self taught in both sign painting and pinstriping and there are plenty of us out there that like a bit of know-how to further our craft. Also for those of you out there looking to get hand painted signage, this will help you get a better idea of what goes on between the placing of your order and receiving the finished product.

For starters if you're looking to get QUALITY hand done work there's more to it than just "painting letters on some wood". This will show you the step by step process it takes to produce a quality, long lasting, exterior sign.

A brief history...
Years ago, in the early 80's, vinyl cutters nearly put every sign painter out of business by decreasing the cost and production time that it takes to make a sign. They also made every single store front look the same because lets face it, there's only so much technology can really make, heart and soul not included...
Thankfully there is a rise and awareness amongst people that are seeking out the old school shit because they don't want the same old photoshopped sign, they want their business to stand out amongst the rest of the bland computer generated, generic and mundane store fronts. The key? Hand painted signage. This is where we begin.

The foundation to any good sign, that will last and be able to stand up to the elements day after day year after year is the wood it's painted on. A must is exterior plywood. Yes its more costly that regular ply but any architect will tell you that the most important step to any building is it's foundation. The difference between standard and exterior ply is that not only does it have a stronger glue to keep the plys from separating over time and exposure but it's also been treated to withstand water(to a certain extent). Once you've cut your wood and put the time in to drill, router, and sand the blanks then you can start.


STEP 1: Primer, drying time: 2-3 hours between coats, coats needed: 2
For exterior signs there's a basic three step process that you need to go through. That process starts with primer. I use a water based primer for the simple reason of drying time. It already takes long enough for the rest of the paint to dry in later steps so I speed it up here where I can. An application of two coats is recommended. You can watch the wood soak up the first coat and start to seal it a bit with the second. Also the primer is nice and thick to help seal up any pin holes that might let water in and destroy the signs from the inside out by causing rot or separation of the plys.

DON'T FOGET...front, back and sides all need two coats. In one full work day, lets say working bankers hours, 9-5, you will have one sign done at the end of the day. 


STEP 2: Undercoat, drying time: 6 hours between coats, coats needed: 1
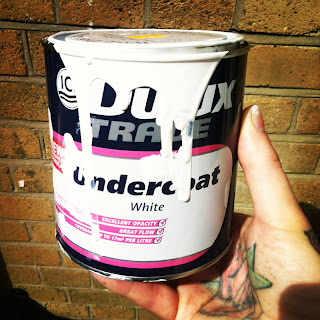
Here's where shit starts to slow up a bit. This is where I start using oil based stuff. The undercoat is important because it seals in the primer and seals out the weather. Also now the wood is smoother in terms of the grain starting to disappear. The last thing you want is a to start painting a sign and have your lettering enamel find every single groove the board has because it's not smooth enough. Luckily only one coat is needed here. DON'T FORGET, front back and sides!!! 12 hours are added here.


STEP 3: Gloss, drying time: 16 hours between coats, coats needed: 2
"Like watching paint dry" comes from this process of steps. I say process because it is, there's a hidden step in here, the one customers don't notice or think of, but this is a QUALITY job so I do it regardless. So apply your gloss, yes, oil based gloss. The standard front back and sides. To get everything sealed nicely and fully coated you NEED two coats of gloss. HIDDEN STEP...in between coats of gloss, if you want a silky smooth and crap free finish, you have to wet sand between coats. You can get away with not sanding but you will have some shit in the paint. Your eye can't see it but your pinstriping or lettering brush will find it. Also smoothing out the finish this much by wet sanding produces a flawless looking mirror finish, like when you paint a car...go ahead and add 64 hours to this step.


STEP 4: Spacing layout
Now that you've taken a week just in preping the signs with paint, for paint, you can finally start the lettering process. In the vinyl world this is done with the single stroke of a key on a computer. In the hand done world this is done with a tape measure, straight edge ruler and a grease pencil. You obviously want to make sure shit lines and matches up, especially when making the same sign more than once...


STEP 5: Letter layout
Once again this is a process that is simplified by a computer and with the stroke of key you can magically have a letter appear on a screen ready to print out. In the hand done world you draw your font and each individual letter you're going to be using. So after you have your letters drawn out and sized proportionately to your spacing layout you can proceed. There's a few ways to do this step, everyone learns differently and every project will teach you something new. The way I do this is by chalking the back of each letter and tracing it onto the sign. By chalking i literally mean take some kids sidewalk chalk and rub it on the back of the paper where you will be tracing. There are faster ways of doing this step like creating a pounce "stencil" of each letter and powdering over the top. The chalking method takes longer but leaves a much more semi-permanent and detailed letter to work from. It obviously comes in handy with heavily detailed letters.


STEP 6: Sign painting
Now is the part we've all been waiting for, the actual lettering of the sign. Most customers think this is what they're paying you for, this step only. Not on my watch, this is step 6! I had to WORK up to this step and rent doesn't pay itself damn it!
So now you can lay your paints on the boards that you've worked so hard on to get to this point, this is when shit starts coming together! Here's a pic of one(of two)signs in process.


STEP 7: Top coat(optional), drying time between coats: 6 hours, coats needed: varies
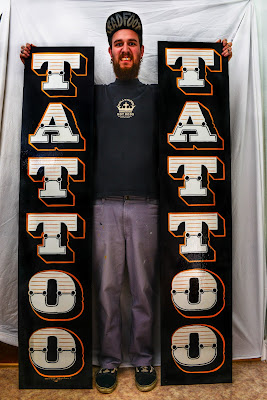
Not every sign needs this step but with these signs, and most others that I do that are on street level in the city, I do it. Street level is where taggers, high presure side walk cleaners, drunks pissing or puking on shop corners and other potential sign destroyers dwell, so I top coat for these and other reasons. I use an oil based clear coat that seals everything up nicely, like when you flatten an image in photoshop basically. It protects from all sorts and is a sign saver if someone decides to tag over your work. Here is a finished photo of the two 6' tall signs side by side...


For this project the shop I was working for also wanted an overhead sign, 2' tall by about 5' wide. Below is a picture of the signs up at the shop, one of the vertical signs is on the other side of the frame work so you can't see it, but this shows you what I mean by street level. Excuse the photo, it was taken by someone else.


Just a friendly reminder these signs are 6' tall, it's hard to see and grasp the size when you look at them through a computer screen so for a laugh, and to help show the scale, I took a picture with the two vertical signs. I'm 6' 3"...


So as shortened as I could keep it without ditching too much of the detail that is why sign painting is the art that it is. There's a lot of work, forethought, knowhow, time, skill, and preping that go into painting even just one sign. So the next time you see a hand painted sign step back for a second and think about what's gone into creating the piece you're looking at. Many people go to a museum to look at art, all you have to do is have a look around where you're at in the city, you're eye will catch the hand done work, that's one of the things sign painters get paid to do. 

If you or someone you know is in the market to get some hand painted signage or pinstriping for their shop, whether it be on the front glass or a piece of wood, feel free to contact me via my website www.vonleadfoot.com or my email vonleadfoot@gmail.com. Prices vary depending on what you might want but budgets are able to be worked within.


A very big thanks to James Killik Photography for helping out last minute!


Thursday, April 25, 2013

Show Season

Thankfully the time that everyone in the car and bike culture looks forward to is upon us...
Show season is on it's way.

Back home in LA we always looked forward to the opening of the season in April, starting with Viva Las Vegas followed by the Lone Star Round-up in Texas. The show season starts a bit earlier on the west coast, due to killer weather, and runs a bit longer with the Mooneyes X-Mas party being the close of the season in December. The Grand National Roadster Show follows that in January of each new year. Out here in England it's a bit different. The Essex Swap Meet is usually the predecessor to the actual start of the season, happening in March when it's still fuckin freezing. From there everyone typically gathers around Wheels Day which is the un-official season opener.

Wheels Day kicks off in April and the weather is never what you want. You're almost guaranteed either pissing rain in freezing conditions on an already wet and water logged field, with hot rods and customs alike getting stuck and having to be towed out, or the odd late season snow.

With another wet Wheels Day behind us there does come a time in every show season that everyone looks forward to. That time in England is steadily approaching and contains the three BEST shows in the country, the Hot Rod Hayride, the Rockabilly Roustabout, and the Trip Out.

The month is July which brings the 1st good show of the season, the Hot Rod Hayride. The weather is near flawless every time but regardless you're guaranteed a killer time. Words cannot describe the utter chaos and drunken debaucherous good times that go on at the rifle range for three days and two nights.
Be there is all that can be said. For more info go to http://www.hotrodhayride.com/home.html.


The 2nd of these top three shows is the perfect gap fill between shows one and three. Small in size but equally as wild and out of control in stature as the Hayride is the Rockabilly Roustabout. This year will be the fifth year running at the Rose & Crown Pub where it all started. Put on by my friends the Scavengers C.C. this show will never disappoint. Bands all day and all night, rowdy into the early hours, and booze that never ends flowing from the pub and trunks of cars. Another winner that will hopefully continue to stay small and close knit. For more info go to https://www.facebook.com/scavengers.carclub.1?fref=ts
Keep your cool & keep the spot, don't fuck this one up if you're a newbie to the show!


By the grace of God we come to the finale of our three show series, The Trip Out. Now if you're purely into bikes, and I don't mean bicycles and I don't mean anything newer than 1980, this is the best show around. Period Choppers, Bobbers, Diggers, Harleys, Brits, the REAL shit! Another camp out gig doing the two night three day spectacular which makes it all the better. Bands, bikes, booze, broads, and bikes. This show, like the others, is run by the true to heart people that have a passion for the real, NOT STORE BOUGHT, shit. Come on out and experience it for yourself, it doesn't get any more legit. For more info go to http://thetripout.co.uk/


As always I'll be there. Not only to support my friends and meet up/catch up with all of 'em but to get  rowdy and sell some goods. I will be at all three shows and I will have a stall at all three. If you're going to be around at any of the parties come up, introduce yourself and say hey! I'll have pinstriped and sign painted goods like helmets, framed pieces, and other one-off  hand done shit for you to browse and buy. Or you can always post up, chat some shit, and get drunk with us! For more info go to www.vonleadfoot.com or my work update page on Facebook https://www.facebook.com/pages/Von-Leadfoot-Pinstriping/124250817627349.

pinstriping-von-leadfoot

If you're looking to get any pinstriping or lettering on the day of these shows go to my web site and email me in ADVANCE(www.vonleadfoot.com). I will have my gear with me but it's always good to check if I'm going to be fully booked each day. It's going to be another good show season, see ya there.


Thursday, April 18, 2013

7 months later...

Well fuck.
Once again I find myself playing catchup. I last left you all in Maine with some details of Chicago and Cleveland. Well since then we completed our road trip around America and made it all the way back to LA, our original starting point. I'll start by giving you a summarized overview of the totals accumulated along the way...

Road Trip Totals:
Milage: 11,500 miles(from point to point, not counting commuting or cruising around)
State Tally: 33 States
Time Driving: 200+ hours(once again not counting anything more than point to point driving)
Gas Cost: $3,500.00 roughly
Start to Finish Overall Time: 6 months
Breakdowns: Clutch slave cylinder in Deadwood South Dakota, blown out 1st gear in Boston Massachusetts, rear axle bearing and seal in Memphis Tennessee, ignition failure in Austin Texas
Road Kill: Only a couple of low flying birds
Traffic Violations: Got out of a speeding ticket in Indiana and another in New Hampshire

Truck Info:
Built in 3 months...
1957 Ford F100 Longbed
Stock 9" rear axle
302 mill with a Comp Cams mild cam, fresh top end, honed cylinders, 4 barrel Edelbrock carb on top of an Edelbrock intake, one wire HEI(trash) ignition and alternator, Headman headers with reverse Smithy's glass packs through Belflower tips
Chevy T5, manual 5-speed trans
Front disc brake conversion
16" Ford stockers with fresh rubbers
Shaved handles & badges
'50 Pontiac tail lights
Custom mixed and sprayed satin white
Rattle can Rustoleum "Night Tide" gloss blue

Before

Before

After

Glory shot
Along the way we met some cool mother fuckers and caught up with some old friends. We drank copious amounts of whiskey and beer, bet on which square chickens would shit on in Texas, celebrated the end of the world with REAL moonshine, molotov cocktails and shot guns, drank in Ernest Hemingway's old haunt in the Keys, honky tonked up and down Broadway, saw 6-toed cats, ate gator in Florida, froze our asses off driving in New Mexico's winter, sweated our balls off driving through South Dakotas summer, got taken care of by the mob in Boston, got stared at in Wyoming, ate Hershey's in Hershey, passed over the Smokies, almost got arrested in DC, saw Old Faithful blow her stack, and had the best BBQ EVER in South Carolina.

Once again, this is only a summary of the greatness of being a nomad for 6 months and some of the things painted along the way...

Trans America Building, SF.
Thanks to Steven and Jason.

Yosemite, every picture you take looks like a God damn postcard.

Had to, Redwood.

Total score, Old Crow Reserve for $9 and Olympia for $6!

Oregon Caves, well worth the coupla bucks.

Storm and pool, Yellowstone.

This fucker was huge, he's on a bit 4' lower than the
 truck and was still a giant, Yellowstone.

She's grumpy, was hotter than fuck. You're correct, NO AC.
Devils Tower, Wyoming.

Aces & Eights, Dead Mans Hand.

Crazy Horse monument in process, Black Hills, South Dakota.

Dead Presidents.

Chicago is one of the best cities, EVER.
Thanks to Amanda, Drew, and the 8/10.

von-leadfoot
Money box done up for Chuck in Chicago.

Pinstriping
Lux Deville bag I did for my girl.

Parked at Voodoo Larry's open house.
Chicago Chris' spray work.

von-leadfoot-pinstriping
Tyler the Barber of Joe's Barber Shop in Chicago.

103 floors above the city, Sears Tower, Chi.
Old Ironsides, the American oak kept her afloat while we sunk the British.
Boston.
Thanks to A.J. and the Mob.


Von-Leadfoot-Pinstriping
Harley Dyna
Boston loves their farings.


Captain America, that was his literal self given
nick name...Boston.
I refused to paint the comic character on his engine hood.

Another big fucker, friends trophy room in Mass.
We later went shooting illegal weapons in the woods.

von-leadfoot-pinstriping
Outlined some flames for the Kingpins C.C.
Boston.

Fuck yeah another pointy pic, get over it.

See above

Homage.


DC at night is a total stunner. Loved the city.

Once again, DC in the evening.

South Bound thru West Virginia

Mileage. You don't notice it when you drive through West Virginia
in the fall.

Storms rolling in over Autumn foliage.

Four Roses Rick House.

The sweet smell of mash. Four Roses Distillery. Kentucky.


Heaven Hill Rick House


These two beauties create all the Makers the world over...

Couldn't pass up the opportunity to
dip our own bottles.

Honky Tonkin, Nashville.

I love that you can still burn smokes inside the
majority of places in Nashville, added bonus.
Thanks to Brice and Chelsea.


After the Opery tour we went to see a program there,
Chuck Daniels decided to burn thru 4 bows
 playing the "Devil Went Down To Georgia"

Santa's Pub, BEST local in Tennessee!

Swap meet find 

Graceland.


All the King's gold.


Still recording to this day.

Blew out the rear axle seal and bearing, Memphis.

Smokies and south again, dodging winters clutches.

BEST BBQ, period. South Carolina.
Thanks to Cassandra and Chuck.

Cape Canaveral, God's waiting room.


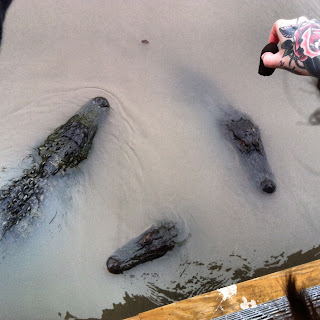
Came in handy being able to get a gator
head in Florida.

South again


After seeing Hemingway's pad in the Keys we had to head
to his old haunt of course...


On the road, somewhere in God's waiting room.

The Big Easy

When in Rome, Sazerac in New Orleans.

Kung Fu Jesus, New Orleans.

Plantation home in Lousianna.

Texas.


Good fried chicken, even better deep
fried deviled eggs.
Austin

Mike and the Moonpies, Ginny's Little
Long Horn.

Chicken shit bingo, Ginny's Little Long Horn,
Austin.
Von-Leadfoot-Pinstriping
Striping acoustics in Tejas.

Caught a Junior Brown gig whilst in town.

Von-Leadfoot-Pinstriping
Another bag, for Drew in Tejas.


Von-Leadfoot-Pinstriping
Collab piece with my good friend Mr. Oz deep in the heart of Texas.

Thanks to Mr. Oz and Sam.

On the road wear and tear, New Mexico.

Roswell, get in and get out. Alien Museum.

Souvenirs of New Mexico.

The rest of the trip was fairly straight forward. We spent X-Mas in Texas in shorts and Tee-Shirts and New Years in Gallup New Mexico freezing our asses off since the heater core in the truck sprung a leak during the summer part of our journey...
We ran a straight shot back out to LA to get the fuck out of the frozen desert after that. Money was low and after putting about four years of wear and tear on the truck in only 6 months it was time to give the old '57 a break. She faired better than expected over the milage accumulation but doesn't do well in the cold like myself. A bit of money saved over the next month and back out to London we came in the beginning of February. This year is shaping up to be a good one so stay tuned, I swear I'll update more often than every 7 months next time...

  
von-leadfoot
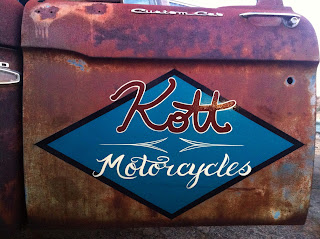
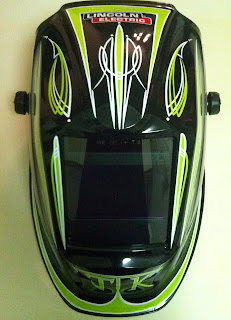
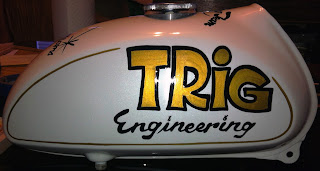
Did some work for an old friend, as well as others, when we got back.
Have a peek, Kott Motorcycles.


von-leadfoot-pinstripingpinstriping


von-leadfoot


von-leadfoot-pinstriping


pinstriping

pinstriping